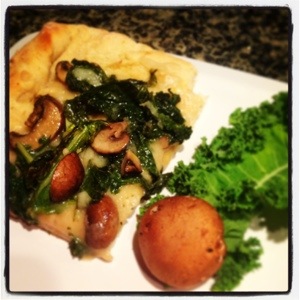
New house, new kitchen, new post: Eggplant Parmesan

I must say, I am a little impressed that I remembered the password to the editor for the blog. I am also saddened that it has taken me seven months to post! I have recently moved into a house with my boyfriend Josh, and while it is no longer upstairs from Publix, I am within a half mile of my original apartment and in love with the new place!

One of the perks of co-habituating is that all of the groceries, produce, cooking gadgets, and utensils are all in one kitchen. This makes both of our lives exceedingly easier. In an effort to also cut down on costs, we now can meal plan and buy food accordingly. Win-Win!

Tonight’s recipe was spawned from a particularly lovely eggplant I found at the Farmers Market (miraculously still walking distance). Having made a large vat of tomato sauce over the weekend (we are both half Italian!), it only seemed right to make Eggplant-Parmesan. Ok, Josh had Eggplant-Parmesan, I had Eggplant-Fake-Vegan-Cheese-That-Kinda-Tastes-And-Looks-Similar-To-Parmesan. While the recipe took a while, the end result was worth it.

I used the recipe from Bon Appetit but cut down the portions from four pounds of eggplant to my very large one eggplant. Because of this, I also cut down on the amount of oil, breadcrumbs, and cheese. Oh, and I used my fake cheese. I also already had my homemade sauce. But the concept is pretty much the same.

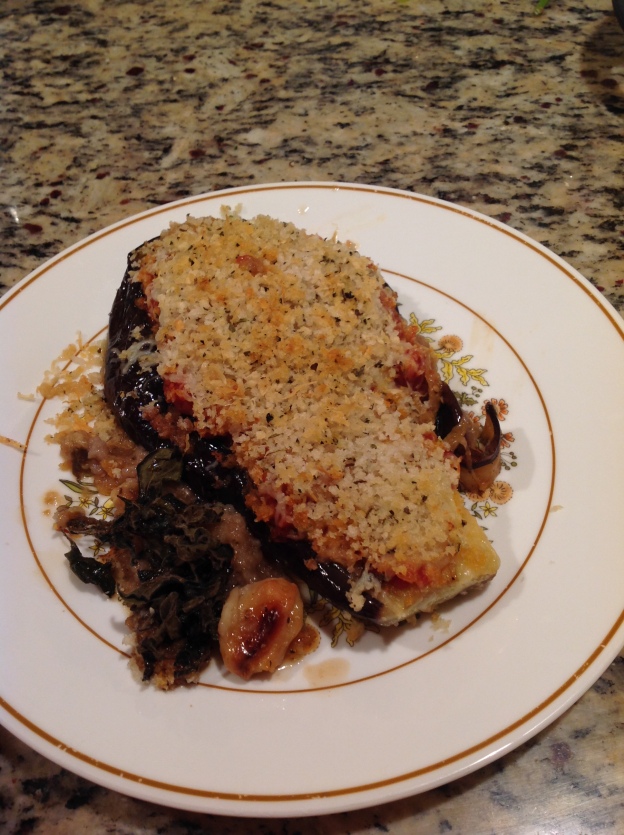
Eggplant Parmesan

Isn’t it pretty?

Ingredients

  • Eggplant
  • 6 sprigs of Oregano
  • 6 whole cloves of Garlic (peeled)
  • 3/4 cup of breadcrumbs (I used Panko and seasoned to taste)
  • 2 tbs olive oil + enough to lightly coat the eggplant
  • Enough tomato sauce to cover the two cut halves of the eggplant
  • Enough mozzarella (or substitute) to cover two cut halves
  • Freshly grated parmesan to dust the top of the cut halves

While the oven is preheating to 400, cut the eggplant(s) in half, and remove all but an inch of skin around the diameter of the cut. According to Bon Appetit, this allows for the flavors to meld together while keeping the shape of the eggplant.  I have found this to be completely correct!  

Next, coat the eggplant in olive oil (lightly coat, do not drench) and season with salt and pepper. 

On a tinfoil lined baking sheet, place the eggplant cut side down, surround with the sprigs of Oregano and whole cloves of garlic. Cover the entire baking sheet with more tinfoil and place in the oven for 40 minutes. The house has a gas over, and it is rather intense. Mine was probably done at 35 minutes (I did not check until 40), the original recipe states that you can go as long as 45 minutes.  The end goal is that the eggplant is really really soft.

Once the proper amount of time has passed, remove from oven, and transfer the eggplant (cut side up this time!), oregano, and garlic into a baking dish. I used two different ones to separate the cheese, but if all household members are of similar diary persuasion, feel free to use a large baking dish instead.

On top of the eggplant, add a generous serving of tomato sauce and mozzarella cheese of choice. Top with breadcrumbs and grate parmesan cheese over the top. Place back in the oven and cook for 25 minutes, or until the cheese is bubbly and the breadcrumbs are golden brown.

Remove and enjoy!

I paired this with sautéed asparagus in butter (another recipe for another time, and yes, vegan butter), and a side salad. 

Josh gave this recipe two thumbs up…my vegan dish was also quite stellar!


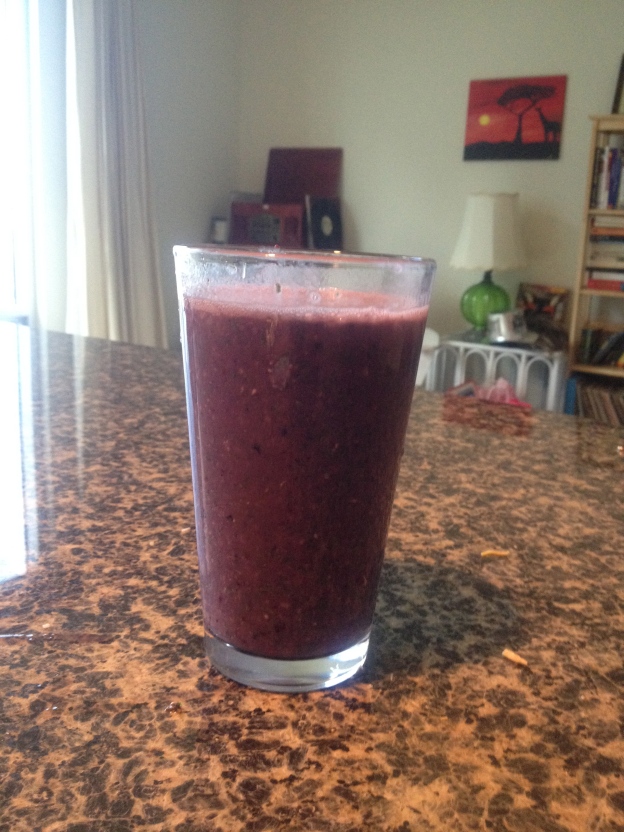
“Beauty Cocktail” A purple ‘green’ smoothie

IMG_3404

I am a firm believer in using food to help with health, and on my never ending quest for new combinations, I stumbled upon an article referring to a “beauty cocktail”. As I skimmed the article, I found that

a.) The health claims were pretty fantastic
b.) I already had a lot of the ingredients on hand!

So as promised in the last post, here it is…a smoothie that will either inspire or traumatize you! I will include a brief explanation to why each is included…

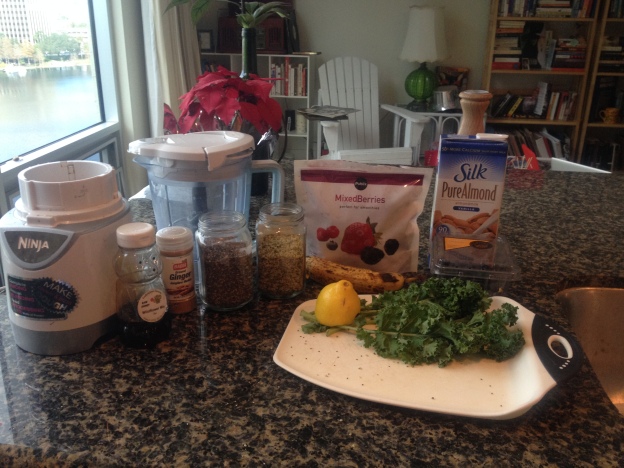
Ingredients:

leafy greens
frozen berries
hemp seeds
chia seeds
almond milk
lemon
ginger
honey

IMG_3399

Here is why:

1.) Leafy green veggies, 1-2 cups. I used kale, but others work as well. This ads vitamin A, which helps with nails, hair, skin, eye health. There is also vitamin B and of course fiber! Also, this is an easy way to get one of your daily servings of veggies out of the way!

2.) Frozen berries, 1 handful (or more!). This helps make the smoothie cold, and smoothie like. Berries have antioxidants (heart, skin, mood help) and of course vitamin C. [I also added some fresh blueberries as I had them on hand]

3.) Banana (I used a half). While it is not in the original recipe, bananas help thicken smoothies. Probiotic, potassium, fiber, and helps with calcium intake.

IMG_3402
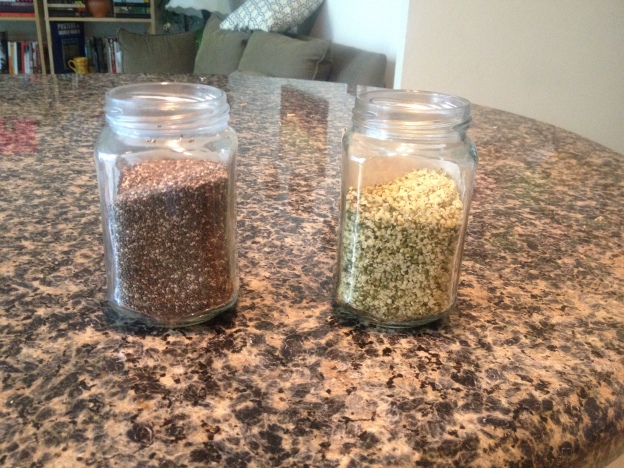
Chia left, Hemp right

4.) Hemp seeds, 1 tbs. This is new for me, according to the internet, hemp seeds are a must have. They contain an impressive amount of protein (including the one that starts collagen production), omega-3 fats, are anti-inflammatory, and have fiber! Also, you can’t really taste them when you add them to a smoothie…so it is a win-win. The only downside I have found so far, is that they are a bit pricey. Hailing at $21 a pound at Whole foods, they may not be the most cost accessible. The good news is that a pound is A LOT of hemp seeds. Especially if you are using them a tablespoon at a time…

5.) Chia seeds. Also new to me, but similar to the hemp seeds, they seem to be packed with important things. Chia seeds include omega 3s, iron, essential fatty acids, protein, B vitamins, potassium, magnesium, and fiber.

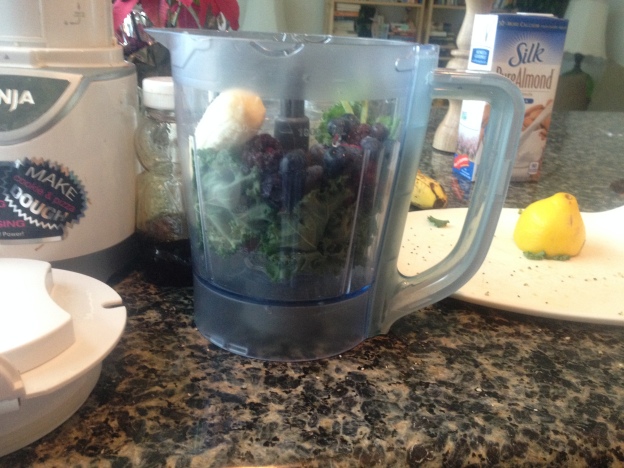
IMG_3401
The ingredients in a blender so far!

6.) Almond milk (~1 cup). I love almond milk! More calcium than traditional milk, filled with vitamin E, and vitamin B. (it is also Gluten free!) I use the vanilla version, which adds a sweeter side to the smoothie.

7.) Lemon (the juice of half of one). Lemon cleans out everything, it breaks down the gunk in your digestive track. Lemon is also a good source of vitamin C.

8.) Ginger (a few shakes…or a small amount of fresh ginger). Ginger helps with digestion and blood flow.

9.) Honey (to sweeten). The website suggests using something to sweeten the smoothie. I prefer honey, as it has antibacterial, anti fungal, and throat health qualities.

The final result is a sweet smoothie, full of health benefits. It may be considered an acquired taste…and if not blended fully, you may have a chewy piece (I know that sounds less than pleasant). I really enjoy the taste, and with the ingredients, it is easy to live a happy and healthy life!

Has anyone else tried this? What would you include?

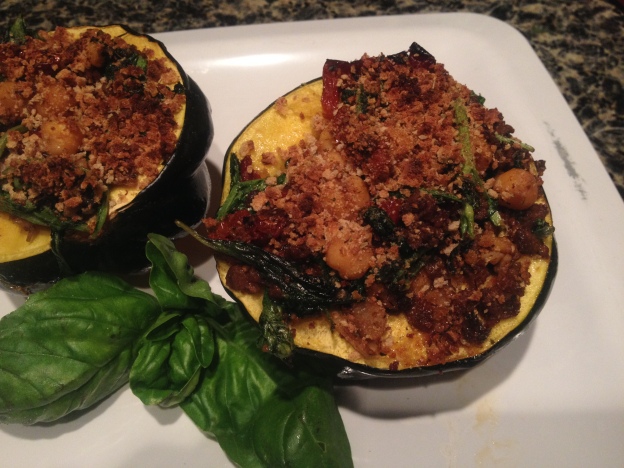
Savory Acorn Squash!

IMG_3395
The past few days have been a time for me to take a step back, look around, and focus on me. A month ago I had damaged my voice while teaching, I then continued to strain as I neglected to take care of…me. Last week I went to a specialist who stuck a tube up my nose and down my throat (not pleasant) and announced, much to my despair, that I had persistent laryngitis, a raw voice box, and vocal nodules. After a hectic and stressful Tuesday, I decided to follow my doctor’s orders and take the rest of the week off of work. I used this time to focus on recovery, help get myself back to health, and to rest my voice. A few days gone in the teaching field is a lot, but the time off was needed, and I am excited to announce that my voice is almost back to normal!

Part of my recovery time included yoga, meditation, and of course, cooking and trying new things! Tomorrow I will either inspire or traumatize you with my super smoothie (warning: it includes kale!)! Tonight, however, I am going to introduce something new, and definitely fun.

While produce shopping a few days ago, I came across an amazing deal, three acorn squash for a dollar. Never having cooked an acorn squash, and not quite sure what to look for, I choose three from the selection and wondered what I could do with the squash. A cursory glimpse at google suggested butter, sugar, and cinnamon…which is lovely, but not for dinner! I eventually found a lovely recipe at The Kitchn took half of the ingredients, substituted the rest, and ended up with an amazing result.

Ingredients: I cooked for myself only this time…adjust the portions as needed

  • one acorn squash
  • olive oil (2tbs)
  • meat crumbles (8oz) (I used boca crumbles, the original calls for turkey sausage, use what you want)
  • red pepper flakes (enough to season)
  • Italian Seasoning (1 tsp)
  • Garlic (2 cloves)
  • sundried tomatoes (to your liking…)
  • chickpeas (half of a can)
  • arugula (1 cup or more)
  • basil (a few leaves shredded)
  • fresh breadcrumbs (enough to top the acorn squash)

First, wash and cut the squash in half. It is close to a circle, so “long ways” doesn’t quite work well as a direction. Stand it up, and cut down the middle. Scoop out the seeds, place in a microwave safe dish with about a half inch of water in it. Microwave for 7-9 minutes. Mine took 9 minutes. You want the squash to be soft!

While that is happening, make breadcrumbs…if you do not have some already on hand, or if you want to be fancy! I broiled pita bread until it was crispy and then used my blender to make breadcrumbs. If you are going for the fresh breadcrumb option, start preparing your bread item now.

In a large frying pan, add olive oil, meat, garlic, red pepper flakes, and Italian seasoning. Cook for about five minutes, add chickpeas, stir and cook for another five minutes. Add sundried tomatoes, cook for another three – five minutes. Add arugula, basil, and water if the mixture is dryish. Wait until the arugula wilts!

By now the squash should be done and your microwave should be annoyingly beeping at you waiting for recognition that it has finished its job. Place the two halves of the squash on a baking sheet, fill with the frying pan mixture, add a tablespoon of water to each (I am not sure why…but I am not going to question it), and then sprinkle with bread crumbs.

The original recipe said to add a shredded hard cheese, like parmesan…I obviously did not do that, although I can see why some would. This would be the time to add dairy.

Place in the oven on broil until either a.) the dairy melts, or b.)the breadcrumbs look rather toasty. I have found that the proper amount of time is exactly equal to the amount of time it took for me to clean my kitchen. This time may vary for you. (Mom, pretend you are cleaning someone else’s kitchen…otherwise you will skip using the oven!)

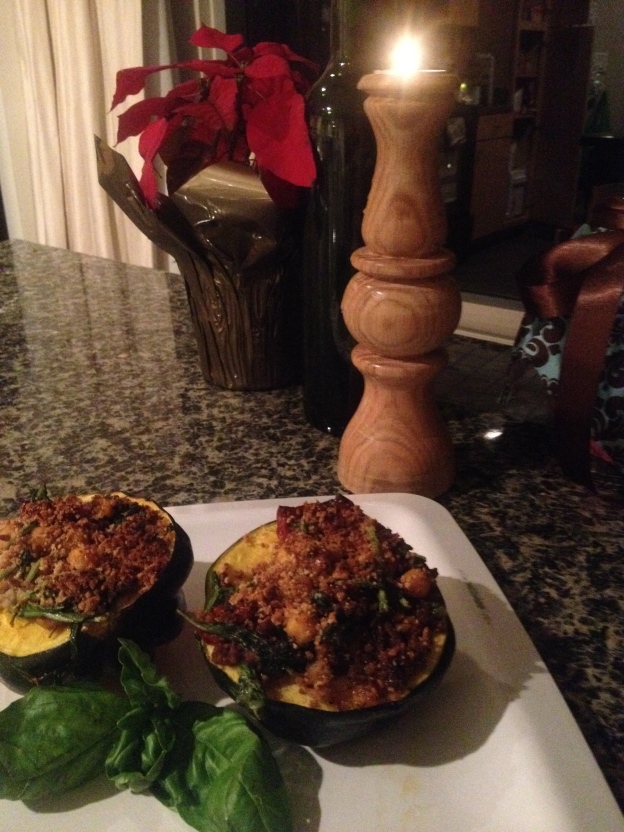
The outcome was pretty amazing.

IMG_3397

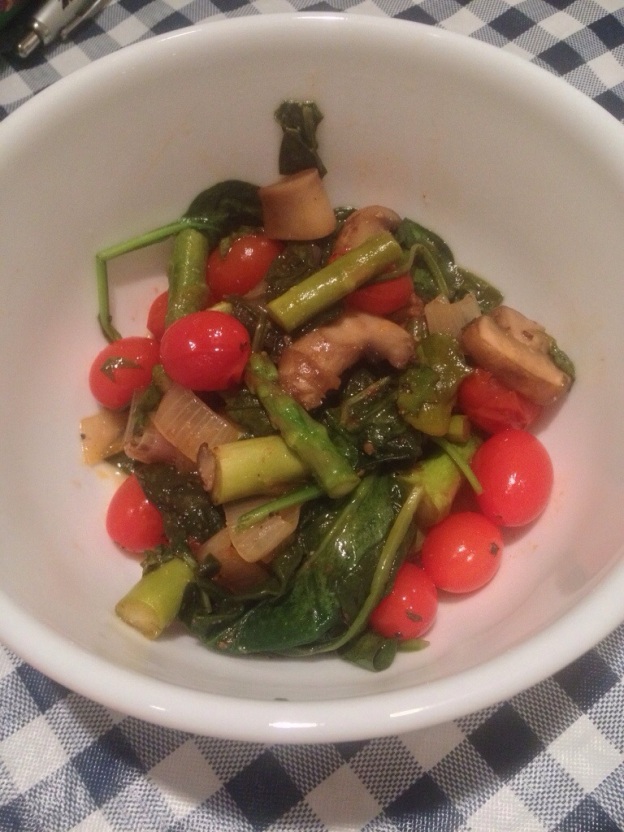
Wilted Kale/Spinach and asparagus

20140104-220640.jpg

One of the hardest parts of eating vegan is not forgoing ice-cream (there are great substitutes!), missing out on fast-food (it isn’t good for you anyway, and there are veg friendly options!), or even eating at a friend’s house (my friends are awesome!), the hardest part of eating vegan is turning down the nice people at publix when they offer you a sample of the latest concoction.

Thursday was no different. The dish looked amazing, wilted kale (which I love), tomatoes (favorite!), something that looked like onions, chopped asparagus, it was easy to tell that vinegar was involved and it smelled lovely. I saw chicken, which could be picked out easily, but my heart sunk when I noticed that it was sprinkled with parmesan. Living vicariously in dairy adventures through Josh, I watched with jealousy as he devoured the sample dish. My spirits, however, were lifted when he not only proclaimed that the dish was phenomenal, but would have to be cooked by us, really soon.

Soon ended up being dinner that night.

Ingredients:

Olive oil (2 tbs)
Shallots (2, or one package, chopped coarsely)
Tomatoes (one pint!)
“Garlic spice mix” (2 tsps, I mixed together garlic salt, basil, parsley, onion powder)
Kale (chopped 5 oz, kale and spinach mixture)
Asparagus (chopped 1 inch pieces 4 oz)
Mushrooms (as many as you want, not part of the original recipe, but added in place of chicken!)
Sugar (3 tbs)
Red Wine Vinegar (1/4 cup)
Fresh Basil (1/2 cup chopped)

Heat oil in a large frying pan and add shallots, tomatoes, and half of the spice mix. Cook until tomatoes are soft. A mushrooms and sauté for a minute or so as you mix the sugar and vinegar.

Let sit for 8-10 minutes, stirring frequently.

Add asparagus, wait a minute, add the kale, basil, and the rest of the spice mix. Cook until the green leafy vegetable of choice is wilted.

Remove from heat and serve. Josh added cheese to his…feel free to also indulge in dairy!

While this dish was simple, it was really good! The vinegar and sugar gives an unexpected glaze to the usually savory vegetables. The shallots were surprisingly awesome…given my hatred for onions, I am excited to announce that I ate all of them!

For those of you interested…here is the original recipe

Cooking in the New Year!

20140102-221457.jpg

Hello all you out there! The past year has been busy, intense, and full of good food that unfortunately went unclogged! Along with a long list of resolutions for the new year, I am going to pick up blogging again…and maybe Kristina will join me 🙂

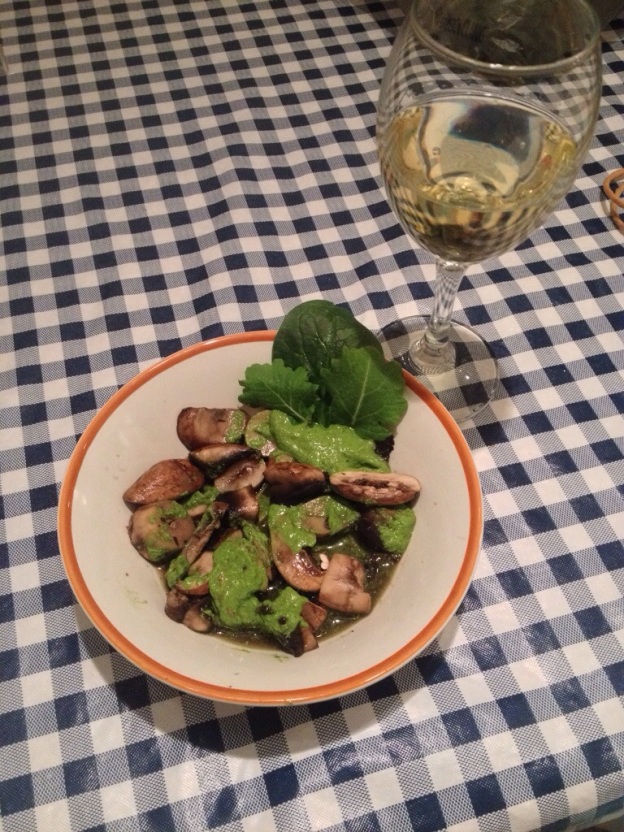
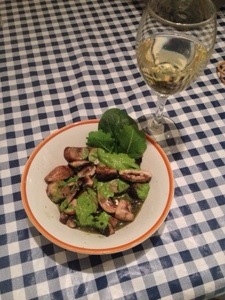
Last night, Josh and I decided that we wanted a dish with mushrooms and kale…we just weren’t sure what form the dish would take. Since publix was closed early for the new year, we roamed the aisles of Walmart searching for ingredients to meet our very vague culinary desires. Grabbing portobello mushrooms, a box of baby bella mushrooms, and the only fresh kale to be found (a spinach and kale duo bag) we decided to make a kale/spinach pesto to go on top of simple sautéed mushrooms.

Ingredients

Kale/spinach (about half of a 13 oz bag)
Garlic (Josh shares my love of excessive garlic so we put in seven cloves of garlic…between 3 to 5 would have been sufficient!)
Walnuts (a handful)
Juice of a lemon
Dried basil (1-2tbs)
Olive oil (add slowly until mixture is creamy)
Mushrooms

To make the pesto, chop garlic and first round or olive oil in the blender until the garlic is fairly demolished. Then add half of the kale, lemon, and walnuts. Blend until creamy, adding olive oil as needed. Once the first round is done, add the remaining lemon, kale, basil, and walnuts and blend. Josh removed part of the top of the blender to push around the ingredients, which worked for a little while. Unfortunately, the utensil he was using caught one of the blades in the blender and pesto was slung all around his kitchen. The biggest tragedy was that the cabinet above the blender was open and the herbs, spices, and collection of oils was painted a dark green! The ceiling was fortunately spared. I therefore advise extreme caution when experimenting with the top of the blender! (Side note…mom, I remember you telling me this would happen one day!)

While the pesto is combining, chop the mushrooms into large chunks, and sauté in olive oil. Remember, mushrooms provide their own juice when heated, so minimal olive oil is required.

Once the mushrooms are done and the pesto is to satisfaction, divide the mushrooms, top with pesto, serve and enjoy!

20140102-221440.jpg

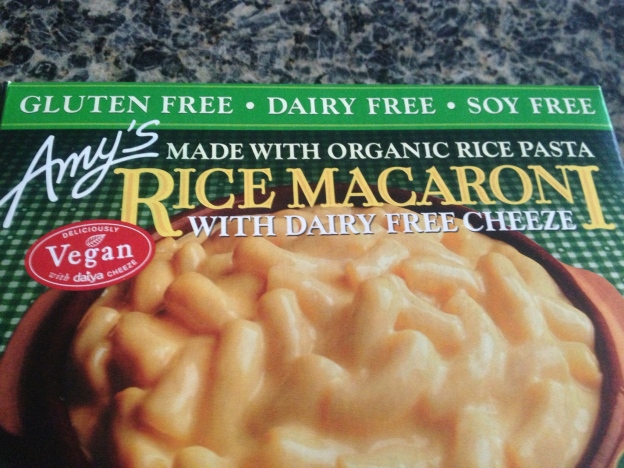
Vegan Review: Amy’s Rice Macaroni and Cheese…gluten free, dairy free, soy free

IMG_2697

I love grocery stores. I love looking at the different packaging, learning different types of food, and seeing what kind of new products are marketed towards those who have different food styles. I was not always this way…I distinctly remember not liking food shopping when I was younger…sorry mom!

Today I came across a Gluten Free, Dairy Free, Soy Free Macaroni and Cheese! Few imitation cheddar cheese products have been able to resemble cheese, and even fewer have had the qualities required for making a decent macaroni and cheese. For these reasons, it has been AGES since I have been able to indulge in the epitome of comfort foods. Seeing that it was on sale, I decided to go for it.

I love Amy’s products, they are frequently vegan and always vegetarian, WIN! I took this one out of the package, removed the plastic wrap, and placed it in the oven for 20 minutes. This is also relatively new for me…I rarely ate frozen food as a kid. As an adult I sporadically indulged in the frozen pizza, or famous pizza rolls…but rarely frozen dishes.

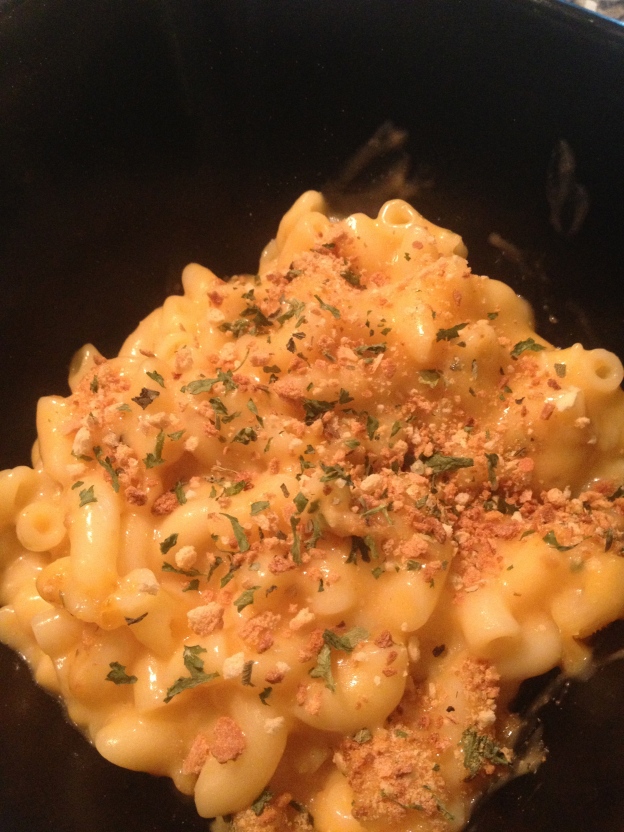
At the “stirring point” I decided to add some flare to the dish. I took the homemade breadcrumbs from last post and added it to the top of the pasta, along with a little garlic salt. You can never have too much garlic! I returned the dish to the oven for five minutes, took out, and was blown away.

IMG_2696

First thing I noticed was that it TASTED authentic…there was no weird fake tastes! The pasta was tender, the cheese was gooey, and the whole things was fantastic. I will admit, it has been a long time since I had had real macaroni and cheese, and entirely possible that I have altered taste buds…but this was really good!

In the end, I recommend Amy’s Rice Macaroni and Cheese (gluten free, dairy free, and soy free as they do have a soy cheese one)

What to do with leftover Tabouli? Stuffed Tomatoes!

IMG_2692

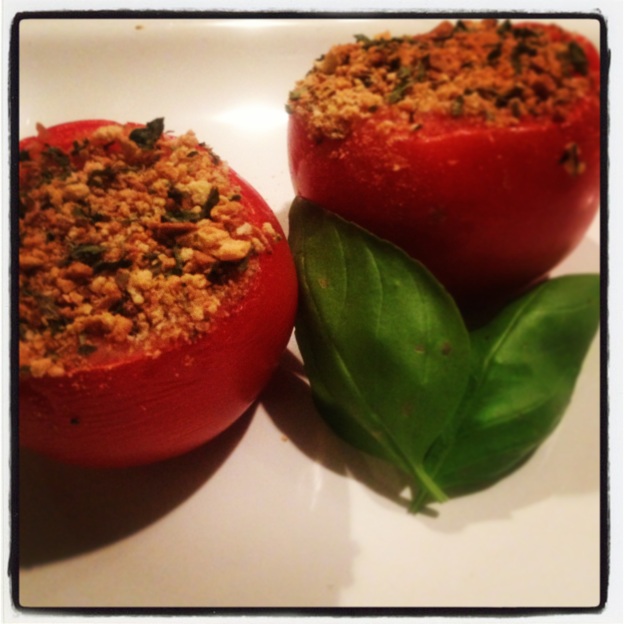
They are almost too pretty to eat!

After making a lot of tabouli yesterday, and indulging in a lovely pita, I decided to scour the internet for more ways to use this delightful salad. Pinterest was able to supply me with a few ideas. Since I have stuffed peppers before, and stuffed portebello mushrooms didn’t work out as well as I had hoped, I decided to try to stuff tomatoes. After all, I had a lot of tabouli.

IMG_2686

This recipe comes from fellow wordpress user A Rented Kitchen and was surprisingly simple to make!

Ingredients

Tabouli
Tomatoes
Bread Crumbs

Since I am always up for a challenge (and simultaneously lack the ability to make anything easy) I decided that I would make my own breadcrumbs. They turned out great! I separated a pita, laid it on a tinfoil covered baking sheet and baked at 350 until crispy. Then I threw it into my ninja blender, crushed to a powder, added italian seasoning and shook! The results were way better than store bought!!

As for the stuffed tomatoes.

First, slice off the top of the tomato, and then scoop out the inside. The end result should resemble this

IMG_2688

Be careful to not puncture the tomato!

Next, add tabouli (almost to the top!), cover in bread crumbs and place into a greased glass baking dish. Bake for 20 minutes at 350, remove and enjoy! The original recipe calls for parmesan cheese on top…but that is totally up to you!

I would definitely make this again…easy, delicious, and would make a great appetizer!

Tabouli Pita!

IMG_2687
I am officially on Summer break! Hooray! It seems surreal that in a mere four weeks I will be teaching my third year of sixth grade history…I am enjoying the quiet time while it lasts!

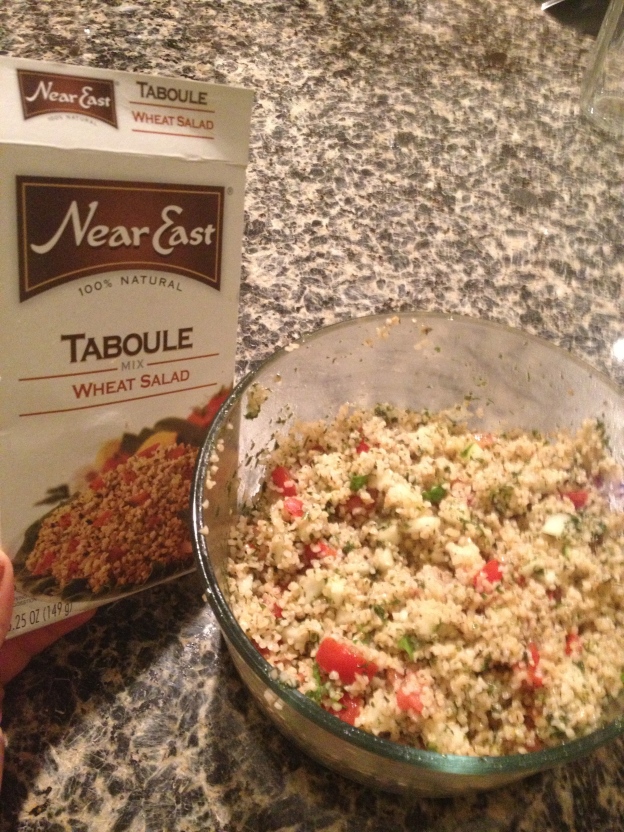
Tonight’s dinner comes from a desire to clean out the fridge, rid my pantry of boxed concoctions, and to try something new-ish. I had a Tabouli box mix from a while back, and decided that tonight was going to finally be the night to try it!

Ingredients:

tabouli mix
1 tbs olive oil
1 tbs lemon juice
1 tomato (cut into small pieces)
1 cucumber (seeded and cut into small pieces)
some fresh basil

The directions seemed simple enough…boil a cup of water, add to mixture, refrigerate for 30 minutes. So I did that first. THEN I read the rest of the instructions, add chopped tomatoes, lemon juice, and olive oil, stir, and refrigerate for ONE HOUR, OR OVERNIGHT! This was going to be my dinner! Ain’t nobody got time for that! I read further, to see if any of the ‘other suggestions for serving’ provided a way to circumvent the time crisis. All I got was ways to spruce up the dish to make it more into a salad by adding diced cucumbers and basil. Being that I recently ended up with an overabundance of both, I was more than happy to place some into the mixture. Remembering a trick I read somewhere (probably pinterest) I placed the mixture into a glass container with a lid, wrapped a damp paper towel around it, and stuck it into the freezer. There is something about the paper towel freezing and transferring coldness faster than just the container in the freezer. If any of you out there are scientists, I would love a better explanation!

While the mixture was cooling, I whipped up some hummus, fetched pita, spinach, and kalamata olives from my fridge and waited. After 15 minutes, I took my mixture out of the freezer, stirred, and put it in for another 10. The paper towel acted as a time machine, and the mixture was sufficiently cooled, hooray for shaving 35 minutes off of my cooling time!

Other Ingredients

Pita
hummus (hummus amount is a personal decision)
spinach (enough to say you had spinach with dinner)
kalamata olives (however many you want!)

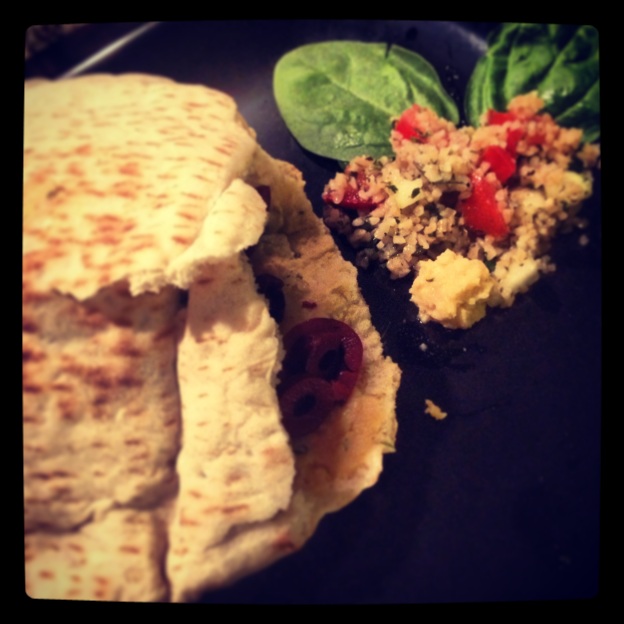
I warmed the pita, stuffed it with spinach, slathered on hummus, added the tabouli, topped with olives, rolled and ate. So good! The best part? I have a TON more for other meals! Perhaps I will find a way to repurpose tabouli…

IMG_2686

Epic protein packed salad!

IMG_2677

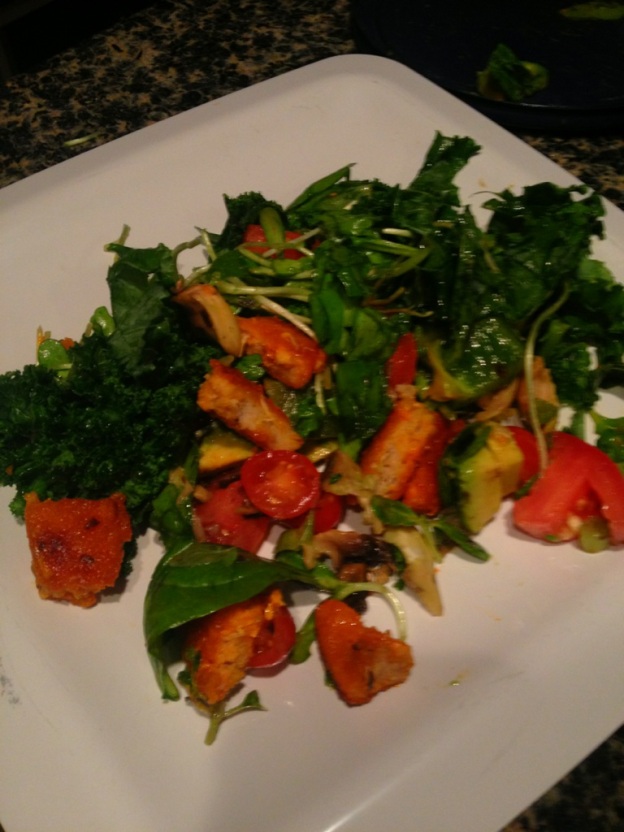
I have recently rediscovered Boca Chick’n Patties, and have fallen in love with them in buffalo wing sauce! With a surplus of vegetables in my fridge from the farmers market, I decided an epic salad was in order. This salad has healthy fats (avocado and olive oil), super greens (kale AND spinach), protein (boca patties and sunflower sprouts), and overall delicious happiness (tomatoes, mushrooms, peppers). Not to mention a whopping 831% of your vitamin A intake, 2,216.8 mg of potassium, 456% vitamin C, and 26.8 grams of protein (imagine if I had placed beans in here!)! Whenever someone asks me where I get my protein from, I should really just link them to my blog…

To those counting carbs, this dish is high: 61.9 grams, and 682 calories. It does, however, make a formidable salad…and I was full for a LONG time after! The photo only shows a small portion of the salad…

I have posted the full health benefits on the bottom of this page for those of you interested.

Ingredients:

Kale, 2 cup, chopped
Spinach, 1 cup
1/2 Hass avocado (finely diced)
6 cherry tomatoes
1/2 fresh medium size tomato
1/2 bell pepper
3 medium mushrooms
1 scallion stalk
1 cup sunflower sprouts
1 Boca Original Chik’n Patties, 1 serving
1 tsp of your favorite wing sauce
1 tbs Olive Oil
1/2 a lemon squeezed
3 basil leaves
chopped oregano

Place the boca patty in a greased frying pan and cook over medium heat for 12-14 minutes, flipping occasionally.

Meanwhile, combine all of the vegetables into a container with a lid. Add olive oil and lemon juice, cover and shake vigorously. This ensures that everything is evenly coated. The avocado will disintegrate a bit, adding to the dressing.

When the patty is almost completely cooked, add the wing sauce. BE CAREFUL! IT WILL BUBBLE AND MAY SPLASH OUT!! Flip one or two times, remove from heat, dice, add to container, cover, shake, put on plate. Voila! an epic protein packed salad!

Due to the explosive flavors in this dish, dressing other than the lemon juice and olive oil is not needed!

If you are not comfortable using the boca burgers, regular chicken will work too! (nutrition facts will change…of course)

Nutrition Facts

1 Serving

Amount Per Serving

Calories 682.7

Total Fat 49.9 g

Saturated Fat 4.3 g

Polyunsaturated Fat 4.8 g

Monounsaturated Fat 18.7 g

Cholesterol 0.0 mg

Sodium 1,051.1 mg

Potassium 2,216.4 mg

Total Carbohydrate 69.1 g

Dietary Fiber 22.9 g

Sugars 13.3 g

Protein 26.8 g

Vitamin A 831.0 %

Vitamin B-12 0.4 %

Vitamin B-6 62.2 %

Vitamin C 456.4 %

Vitamin D 10.3 %

Vitamin E 27.5 %

Calcium 45.4 %

Copper 53.3 %

Folate 73.4 %

Iron 62.1 %

Magnesium 40.3 %

Manganese 110.5 %

Niacin 36.9 %

Pantothenic Acid 26.6 %

Phosphorus 27.8 %

Riboflavin 45.5 %

Selenium 13.5 %

Thiamin 32.3 %

Zinc 16.9 %

*Percent Daily Values are based on a 2,000 calorie diet. Your daily values may be higher or lower depending on your calorie needs.

\

Roasted Garlic, Kale, and Baby Bella Pizza

20130703-213246.jpg

Hooray! Two posts in a row!

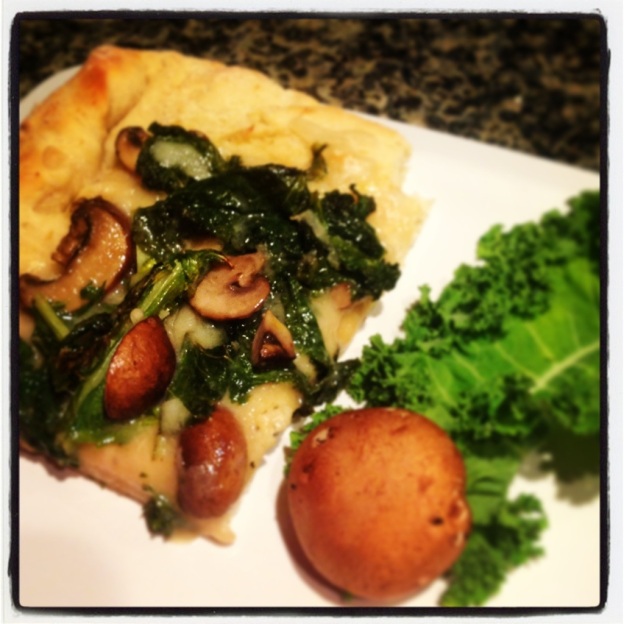
I had this recipe posted TWICE in my pinterest board…it clearly had an impact on me! Incorporating my favorite ingredients, garlic, kale, and mushrooms, it also was on a pizza! I haven’t made a pizza in ages.

I am really impressed with the ability of Veggie Cheese’s (Vegan purple bag!) ability to melt, an important component of fake cheese. For this recipe I also broke and finally bought new olive oil. I had been using almond oil for a while, and it has been lovely! (No, it doesnt taste of almonds, just a lighter oil). As usual, I decided to make my own pizza crust. If you choose this option, please see my directions to the PERFECT pizza crust here

If you are curious for the original recipe, please visit Oh My Veggies


Ingredients

  • pizza crust
  • 1 bulb of roasted garlic
  • 2 tbs olive oil
  • 4 stems kale
  • 7 baby bella mushrooms
  • cheese (I used vegan mozzarella, regular mozzarella would also work)
  • salt and pepper

First you need to roast the garlic. Embarrassingly enough, I had never done this before! Thankfully wikipedia helped…First take the bulb of garlic and peel off the outer paper layer. Then, chop off the very tip of the top of the bulb, so you can see into the cloves…but do not take off too much of the cloves! Drizzle olive oil on the top, wrap in tinfoil and heat in the oven at 350 for 35 minutes. Voila! Roasted Garlic.

But can’t you just use regular squished garlic?

NO YOU CANNOT!! Trust me on this…roasted garlic is the way to go!

While the garlic is roasting you have the opportunity to make pizza dough, read, catch up on the news, clean your kitchen, do some laundry, run to publix (if it is downstairs like mine!), or some other activity.

Once the garlic is roasted, take it out of the oven, open the foil and let it cool off…it is hot! very hot!

While the garlic is cooling, slice the baby bella mushrooms, and heat them in a frying pan with a tablespoon of olive oil. They should take about 3 minutes to get nice and soft. Then add the kale, cut/chopped/ripped into manageable pieces. Sautee for another 3-4 minutes until the kale is wilted. Season with salt and pepper.

The garlic should be good now! Take the cloves out of their individualized wrappers (this was easier than anticipated), add a little bit of olive oil, some salt and pepper, and mash the cloves with a fork to create a paste. Mine was more lumpy than pasty, but it worked out fine in the end.

If you bought your pizza crust, put it on a pan (dont forget to grease the pan!). If you made your pizza crust, roll it out and put it on a pan. Cover in roasted garlic paste, but be sure to leave space for the crust!

Place enough cheese to lightly cover the crust, add the mushrooms and kale, and add more cheese. The amount of cheese really is a personal decision between you, your tastebuds, and your stomach.

Bake in the oven at 450 for 10-15 minutes, depending on how cooked you want the crust. One of my favorite parts about vegan cooking is that everything can be eaten raw…so undercooking is never a problem!

When the crust is golden to satisfaction, remove from oven, allow to cool, and enjoy!

20130703-213218.jpg
<br /